How to Install VirtualBox on Apple Silicon Mac?
VirtualBox is a free and open-source virtualization software that allows users to run multiple operating systems on a single physical machine. With VirtualBox, users can create virtual machines (VMs) that run on a host operating system and act as if they were separate physical computers. This allows users to run different operating systems and their applications on the same physical machine without the need for multiple physical devices.
VirtualBox provides a variety of features, including support for a wide range of guest operating systems, snapshotting for preserving the state of a virtual machine, and integration with popular development environments. It is a popular choice for software developers, testers, and users who need to run multiple operating systems for various purposes.
VirtualBox is available to install on Windows, Linux, Mac (Intel and Apple Silicon) and Oracle. Currently VirtualBox is available in beta version for Apple Silicon processors but you can use it to install and test any operating system. It is very exciting news because it is a native version of VirtualBox for ARM processors of Apple.
Apple Silicon refers to Apple's custom-designed ARM-based processors used in their Mac computers. The transition from using Intel x86 processors to Apple Silicon began in 2020 and since than Apple has released M1 and M2 processors with their computers.
Advantages of Apple Silicon:
- Improved performance and efficiency due to the use of the ARM architecture
- Better compatibility with iOS apps and the ability to run both macOS and iOS apps
- Longer battery life
- Improved security due to the architecture design
Steps to Easily Install Install VirtualBox on Apple Silicon Mac
- Go to the official VirtualBox website and find the “Developer Preview for macOS/Arm64 (M1/M2) Hosts”.
- You will need to download the DMG file.
- Open the dmg file of VirtualBox for installation. (These steps are simply because you can follow using the on-screen instructions)
- Next, you need to double click on the VirtualBox.pkg file to launch the installer. The installation process is very simple therefore it is required to mention the step-by-step process. Also, to confirm the successful installation of VirtualBox on M1 and M2 Mac, check if VirtualBox has been added to the Applications directory, if it is not there, try reinstalling.

Create Virtual Machine using VirtualBox in Mac (M1 & M2 Mac)
Step 1. Download ISO Image:
The first step of creating a virtual machine using VirtualBox is to download the ISO image of the operating system that you want to install. For instance, if you want to install Windows 11 or Windows 10, you will have to download the ARM version of these operating systems. The same way goes for the Linux distributions too. For instance if you want to run Ubuntu, download the Ubuntu ARM addition right away.
If you cannot find the ARM addition of Windows 10 and Windows 11 ISO images, download them from uudump.net.
Step 2. Create a new virtual machine
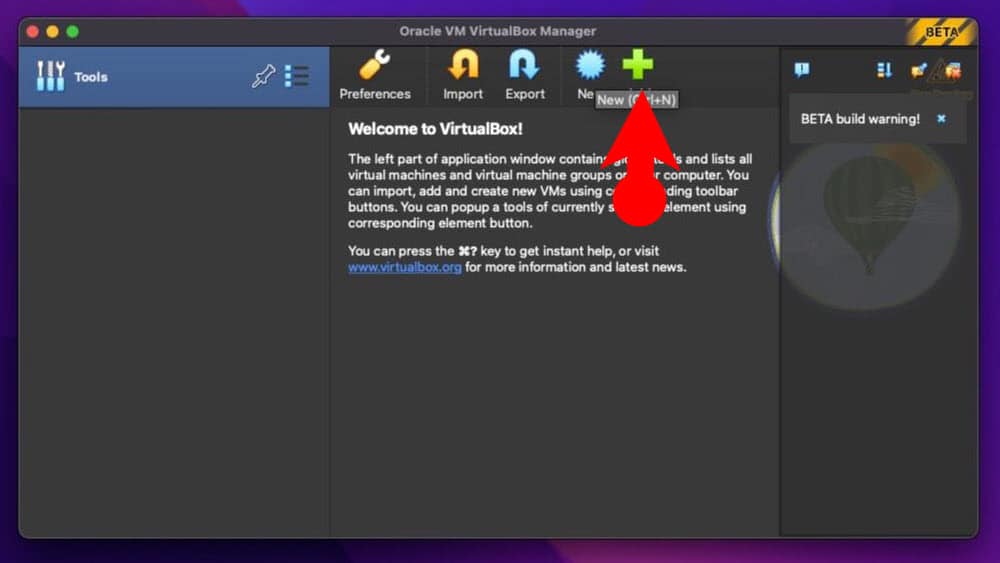
Launch VirtualBox from the Applications folder or by searching for it in Spotlight. Following that, in the VirtualBox Manager, click on the “New” button to create a new virtual machine.
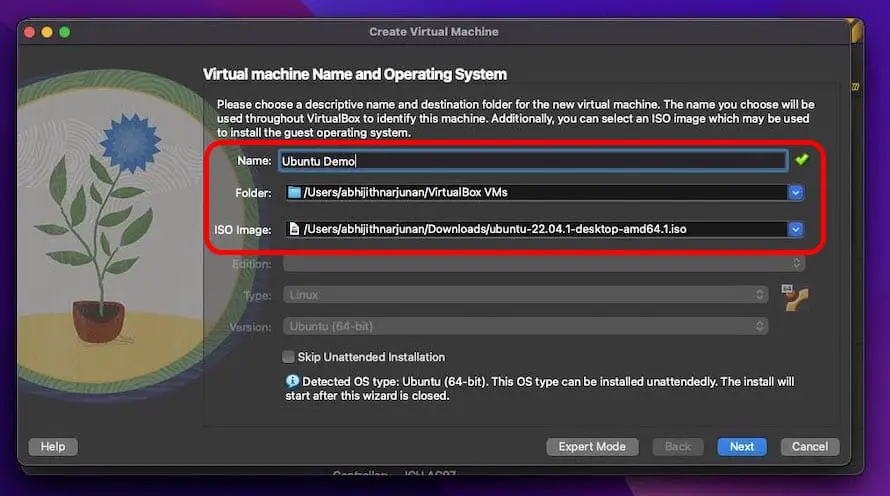
Step 3. Choose the operating system
In the “Create Virtual Machine” wizard, choose the type of operating system and configure the below necessary settings.
- Give a Name to the Virtual Machine
- Choose a location where you want to save it.
- Finally, attach the ISO Image of the OS to the Virtual Machine.
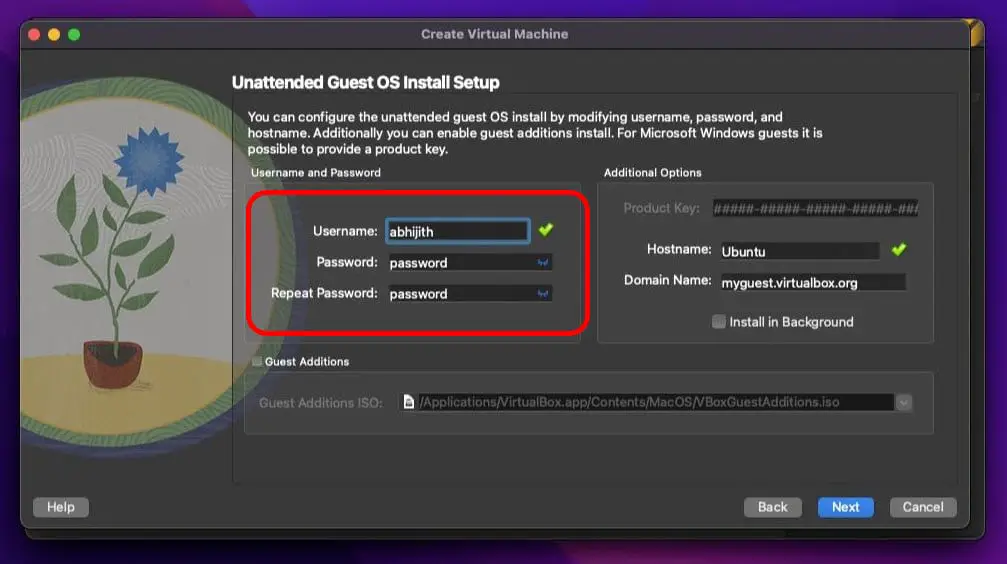
Step 4. Guest OS Setup (Optional)
In this step you can configure the unattended guest OS installed by modifying the username, password and host name. Additionally, you can also enable guest additions and install for Microsoft guest as it is possible to provide a product key here.
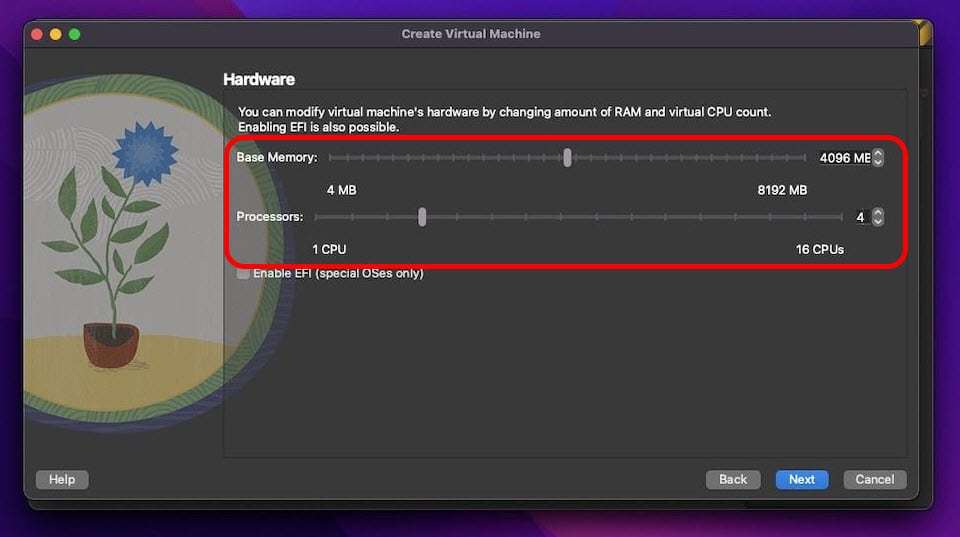
Step 5. Assign memory & Processor
Next, assign the amount of memory (RAM) and CPU cores to the virtual machine. In my experience, it’s better to provide half the resources of your computer to the virtual machine. But mostly it depends on the type of work that you intend to do with the virtual machine. For instance, if you want to install Windows for the sake of playing game, it is better to provide half the sources of your computer.
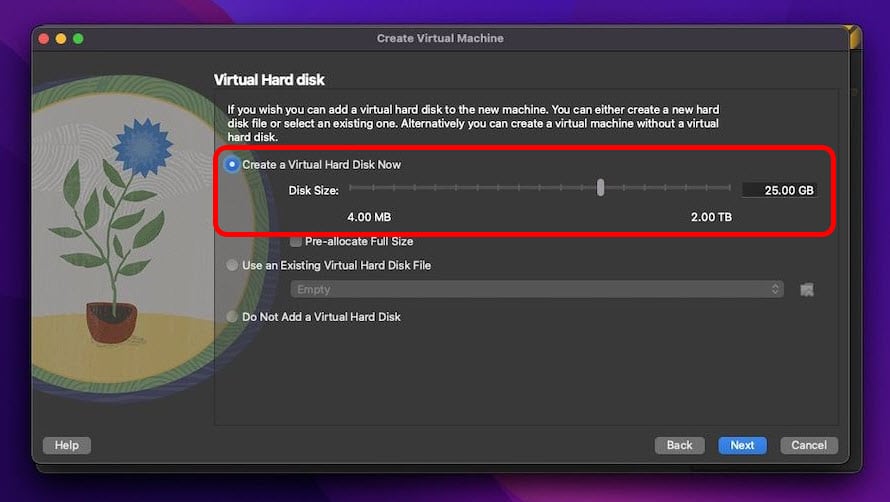
Step 6. Virtual Hard Disk Configuration
Choose “Create a virtual hard disk now” and mention the hard disk space you want to allocate to the virtual machine. I will assign 25 GB of storage for the sake of testing Ubuntu.
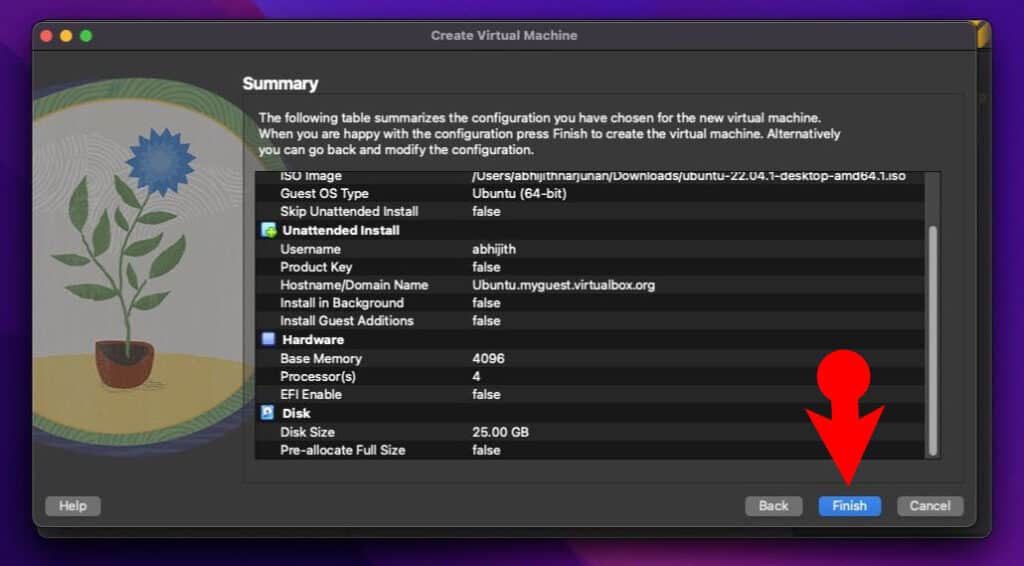
Step 7. Review the settings
In this step, review all the previous settings you have configured for the virtual machine to make sure everything is in order before clicking on the finish.
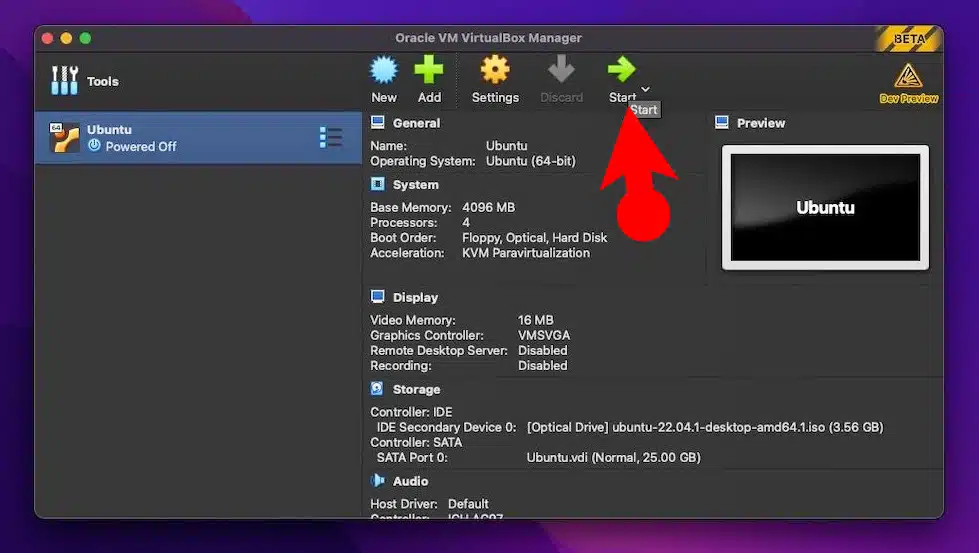
Step 8. Start the virtual machine
With everything set up, simply click the “Start” button to power on the virtual machine and begin the process of installing the operating system.